Backup/Restore and Disaster Recovery are a couple of the most popular use cases for the cloud. With the Jamcracker Cloud Management Platform, you can use snapshot and image mgmt capabilities with schedule based policies to provide rapid recovery for failed applications or corrupted data.
In this blog we will walk through a scenario using Image Management and Volume Snapshots to support a backup and recovery plan for a classic enterprise application.
Scenario
Most classic enterprise applications that have been virtualized or migrated to a cloud service provider will be running one of more virtual machines with application data stored on a storage volume that is separate from the virtual machine instance(s). By using a separate storage volume, you realize operational efficiencies during backup and recovery. While application data is constantly changing and cannot be "rebuilt" without a backup, the operating system and application files change rarely and/or can be rebuilt from scratch.
Such storage designs allow you to have separate maintenance plans that are appropriate for the data. For example, it would be pretty inefficient to take frequent backups of an operating system and application volume since it does not change very often. However, the data that the application produces can change very rapidly, so the frequency of data backup would be higher than backing up the application itself.
In the scenario we will walk through, we want to be able to quickly recover from any OS or application error or corruption, as well as protect against any accidental (or intentional) data corruption.
Note: This article assumes that the user’s role has appropriate privileges defined under Manage ->Roles and Privileges.
The Approach
To guard against any VM instance failure or unrecoverable application error, we will backup and restore our application to/from an Image. To protect against data corruption or loss, we will use scheduled backups and restore from the latest “known good” volume snapshot.
Create Image from VM Instance for Operating System and Application Backup/Restore
Virtual machines that hold the Operating system and Application can be backed up manually or on a schedule by creating Images.
To create an Image manually
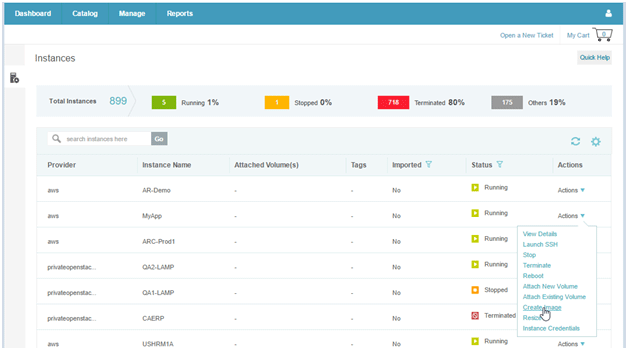
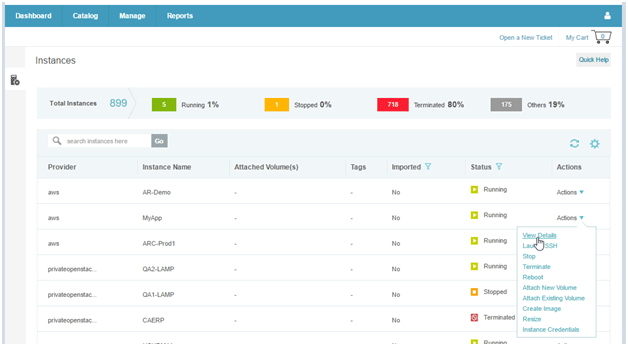
To create an image from a virtual machine instance manually, visit the Manage – Instances tab, find the VM Instance, and then hover over Action and select Create Image.
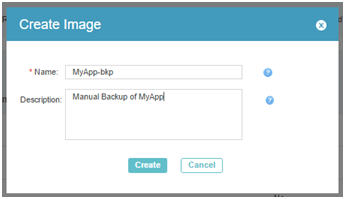
You will them be prompted to enter a Name and Description for the Image. Enter the information and click the Create button.
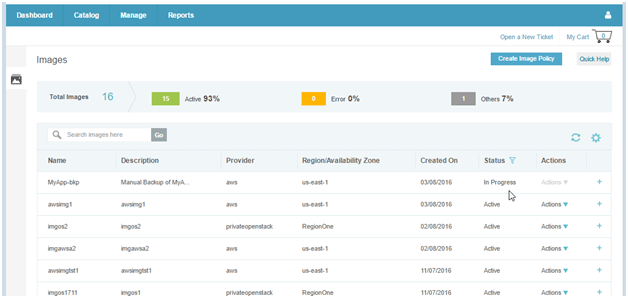
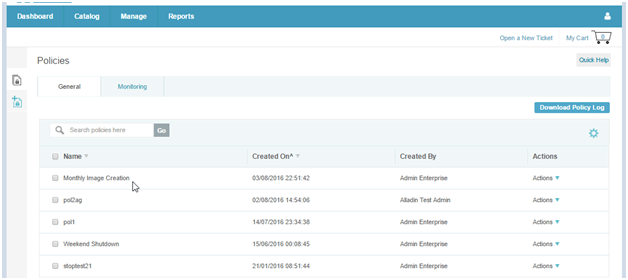
The Image creation will begin, and you can see the Status under Manage – Images:
To Schedule Image Creation
To schedule system backups, we will set a recurring policy for Instances with a Create Image action.
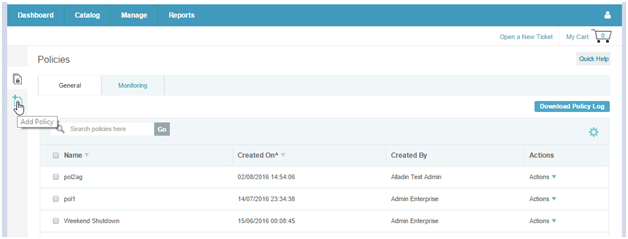
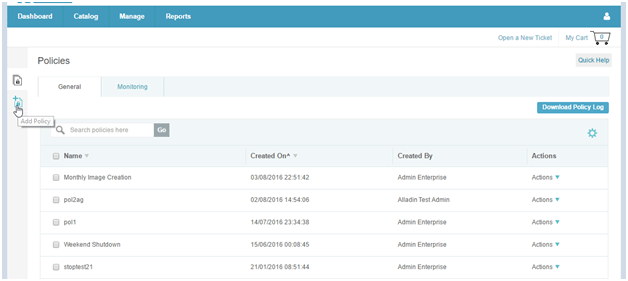
Under Manage – Policies, click the Add Policy icon.
In the screen that appears, enter the Name and Description, and in the Policy For field, select Instance.
Select Calendar for the Using field, Specify your recurring frequency (e.g. Monthly) and specify the Time and Day of Month that the image should be created.
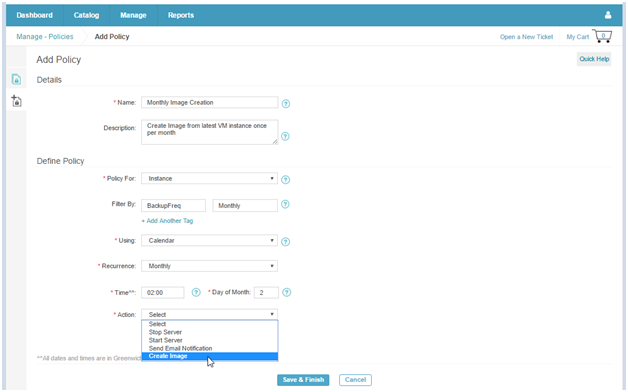
Last select Create Image for the Action field, and then click Save & Finish. Your monthly VM image backup policy is now set.
Tag those Instances that need Backup
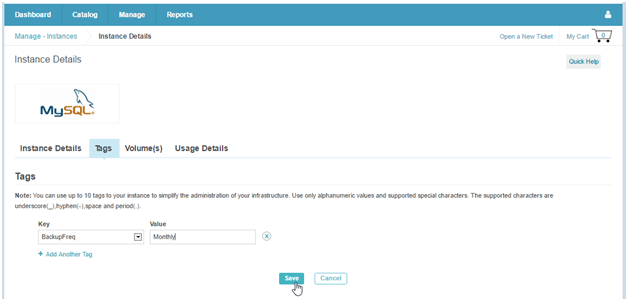
For any instance to be backed up to an Image per this policy, you need to set the tags to identify these instances. In the screenshot above, we used the tag BackupFreq=Monthly.
To Tag an Instance, visit the Manage – Instance screen, and locate the Instance that you want the policy to act on. Hover over Action and select View Details.
In the View Details screen, click on the Tags tab, and then enter the tags you want to apply to the instance, then click Save.
Repeat this for all Instances that need this monthly backup
Using Volumes - Creating a new Data Volume
Before we get into setting policies for volume backups, lets take a look at how to create a data volume to start with.
Once you have used the Jamcracker platform to launch your application servers, find the instance (in the Instances screen, under Manage -> Instances) which will mount the data volume.
Once you located the VM instance of interest, click on the Actions link to show instance options, then select the Attach New Volume option.
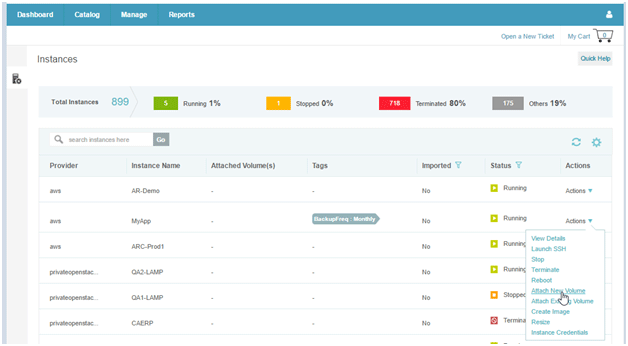
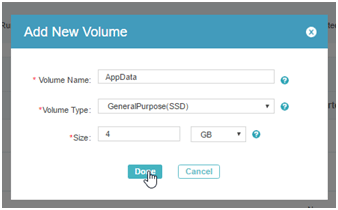
Define your volume Name, Type and Size and then click Create.
Note: Your volume type may have different fields (e.g. Volume Type may be Magnetic, SSD, Tier 1 etc.) than shown here, depending on how your particular instance was deployed.
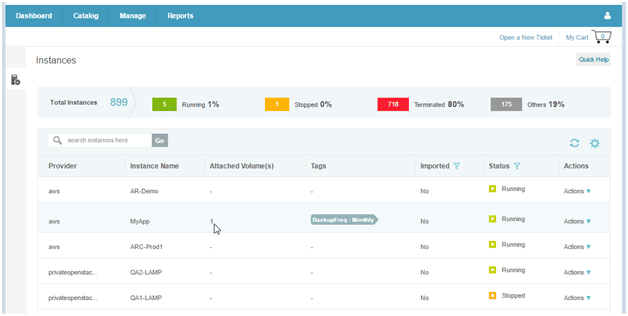
Within a couple of minutes, your data volume will be available to your application, as shown below:
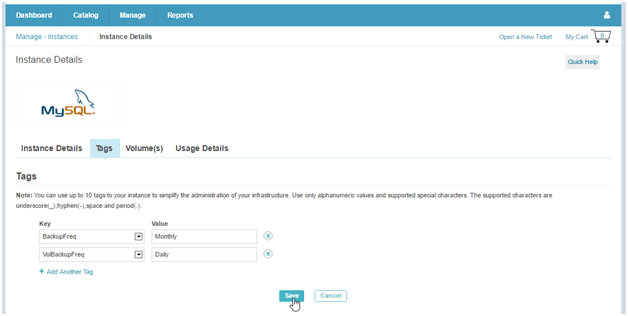
Set your Tags
The policy engine will use tags associated with the VM Instance to select the Volumes that will be used. Accordingly, it is important to define a unique tag for the VM instance(s) that can be used for this policy.
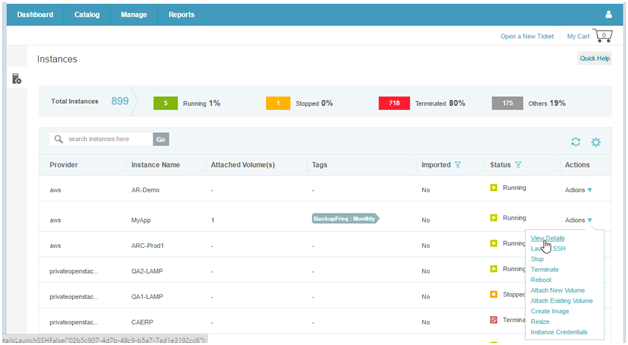
To define the Tag for the instance, in the Manage - Instances screen, click on the Actions link to uncover options, and the select View Details.
Then switch to the Tags tab, then add the new tag Name and value (In this case we will add VolBackupFreq = Daily tag) and click Save.
You are now ready to define the volume backup policy.
Setting a Volume Snapshot Policy
To set the volume backup policy, select Manage -> Policies then click the Add Policy icon on the left.
Now enter the Name of the Policy, a Description, and select the Volume option under Policy For dropdown.
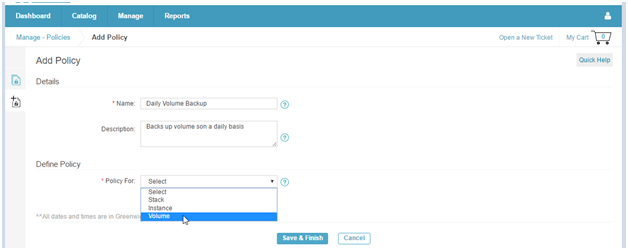
Once you select Volume, additional options appear.
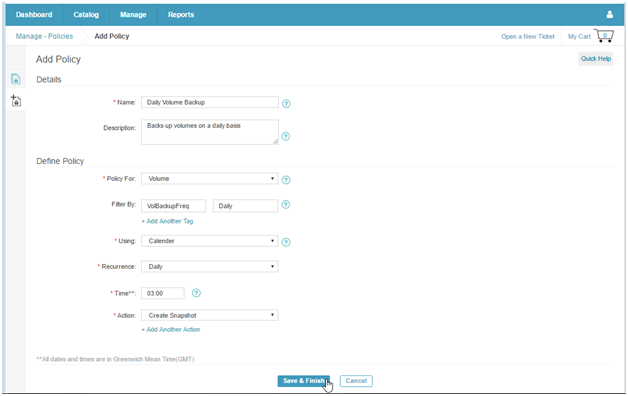
Enter the Tag name and value in the Filter By fields, select Calendar for the Using option, select the Recurrence value (e.g. Daily), and the Time of day that you want it to occur, then select Create Snapshot for the Action option, and click Save & Finish at the bottom of the window.
You are now finished defining the Policy that will run a Volume Snapshot on all volumes attached to VM Instances with the selected Tags, according to the schedule you specified.
Data Recovery
Recovering your data after a failure of the Application takes a few steps.
First, launch your Application again using the usual AppStack Launch functionality, or, if you backed up the instance to an image, you can visit the Manage – Instances screen, find the Image that you want to use, and then hover over Action and select Create Instance.

Next, you need to create a new volume from the desired volume snapshot. To do this, go to Manage ->Volume Snapshots, find the snapshot that was last created by the policy. The snapshot will be named "Snapshot for VOLNAME_ID" (where VOLNAME is the volume name and ID is a unique identifier).
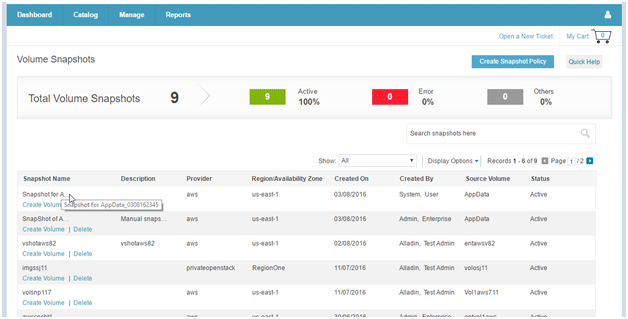
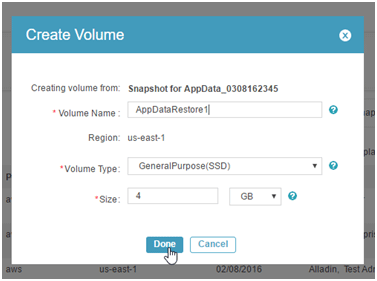
Find the snapshot with the latest Created On date assuming you want the latest snapshot, and then click the Create Volume link under the Snapshot name. You will need to give this volume a new Volume Name, while the Type and Size values are preserved from the original volume.
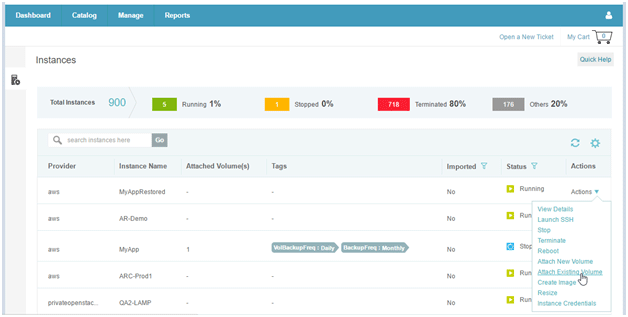
The last step is to attach the volume to the new Application instance. Under Manage-Instances, select the VM instance that needs the volume, then right click on Actions and select Attach Existing Volume.
Then select the restored volume from the list by clicking the checkbox, and click Done.
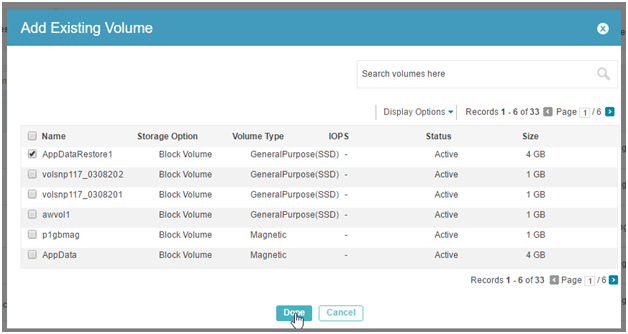
Within a few minutes, the backup data volume will be attached to the virtual machine instance.
Wrap Up
With these steps, you have established periodic backups for your key servers and disk volumes, and have performed a restore of both application and data. You now have a useful tool in your operations tool chest, and can guard against many failure scenarios.